Renter Friendly Backsplash: Peel-and-Stick vs Tile Stickers vs Plexiglass
Three renter friendly backsplash methods compared by deposit risk, cost, and removal difficulty, including the zero damage plexiglass panel approach.

Disclosure:Some links on RenterFriendly.com are affiliate links. If you buy through them, we may earn a small commission at no extra cost to you. We only feature products we’d use in our own rentals. See our transparency policy.
Quick Answer
A renter friendly backsplash is a kitchen or bathroom wall covering installed without grout, mortar, or permanent adhesive, so it can come down at move-out without damaging the wall underneath. The three main methods are peel-and-stick tile sheets ($4 to $12 per square foot), vinyl tile stickers applied over existing tile ($25 to $80 for a typical backsplash area), and peel-and-stick tile mounted to plexiglass panels that hang on Command Strips. Tile stickers and the plexiglass method carry the lowest deposit risk. Peel-and-stick applied directly to painted drywall works, but it can pull paint on removal, so it needs a patch test first.
A renter friendly backsplash solves a problem almost every rental kitchen has: the wall behind the counter is either bare landlord-white paint or dated tile you would never choose, and a permanent fix is off the table. Traditional tile installation runs $15 to $40 or more per square foot, requires grout and mortar, and is exactly the kind of alteration that costs you a security deposit if you do it without written permission.
The removable alternatives have gotten dramatically better in the last few years. Peel-and-stick tile now comes in vinyl, 3D gel, metal, and even real stone composite finishes that read as real tile from a few feet away. But "removable" on the box does not always mean removable from your specific wall. When Apartment Therapy tested Smart Tiles in a rental kitchen, the sheets went up easily and looked great, but peeling a sheet back to readjust it chipped paint off the wall. Their tester's verdict: not fully renter friendly.
Renter Friendly DIY Kitchen Renovation
 @karlapaolapd
That is why this comparison is organized around deposit risk, not looks. All three methods below can produce a backsplash you actually like. They differ in what happens to the wall when your lease ends.
Renter Friendly Backsplash Methods Compared
Method | Cost per project | Best surface | Deposit risk | Removal time |
|---|---|---|---|---|
Peel-and-stick tile sheets | $60 to $250 | Smooth, semi-gloss painted drywall or existing tile | Medium | 30 to 90 min with heat |
Tile stickers (decals) | $25 to $80 | Existing ceramic tile | Low | 15 to 30 min |
Plexiglass panel method | $100 to $350 | Any smooth wall (adhesive never touches it) | Low | 10 to 20 min |
Peel-and-stick tile sheets
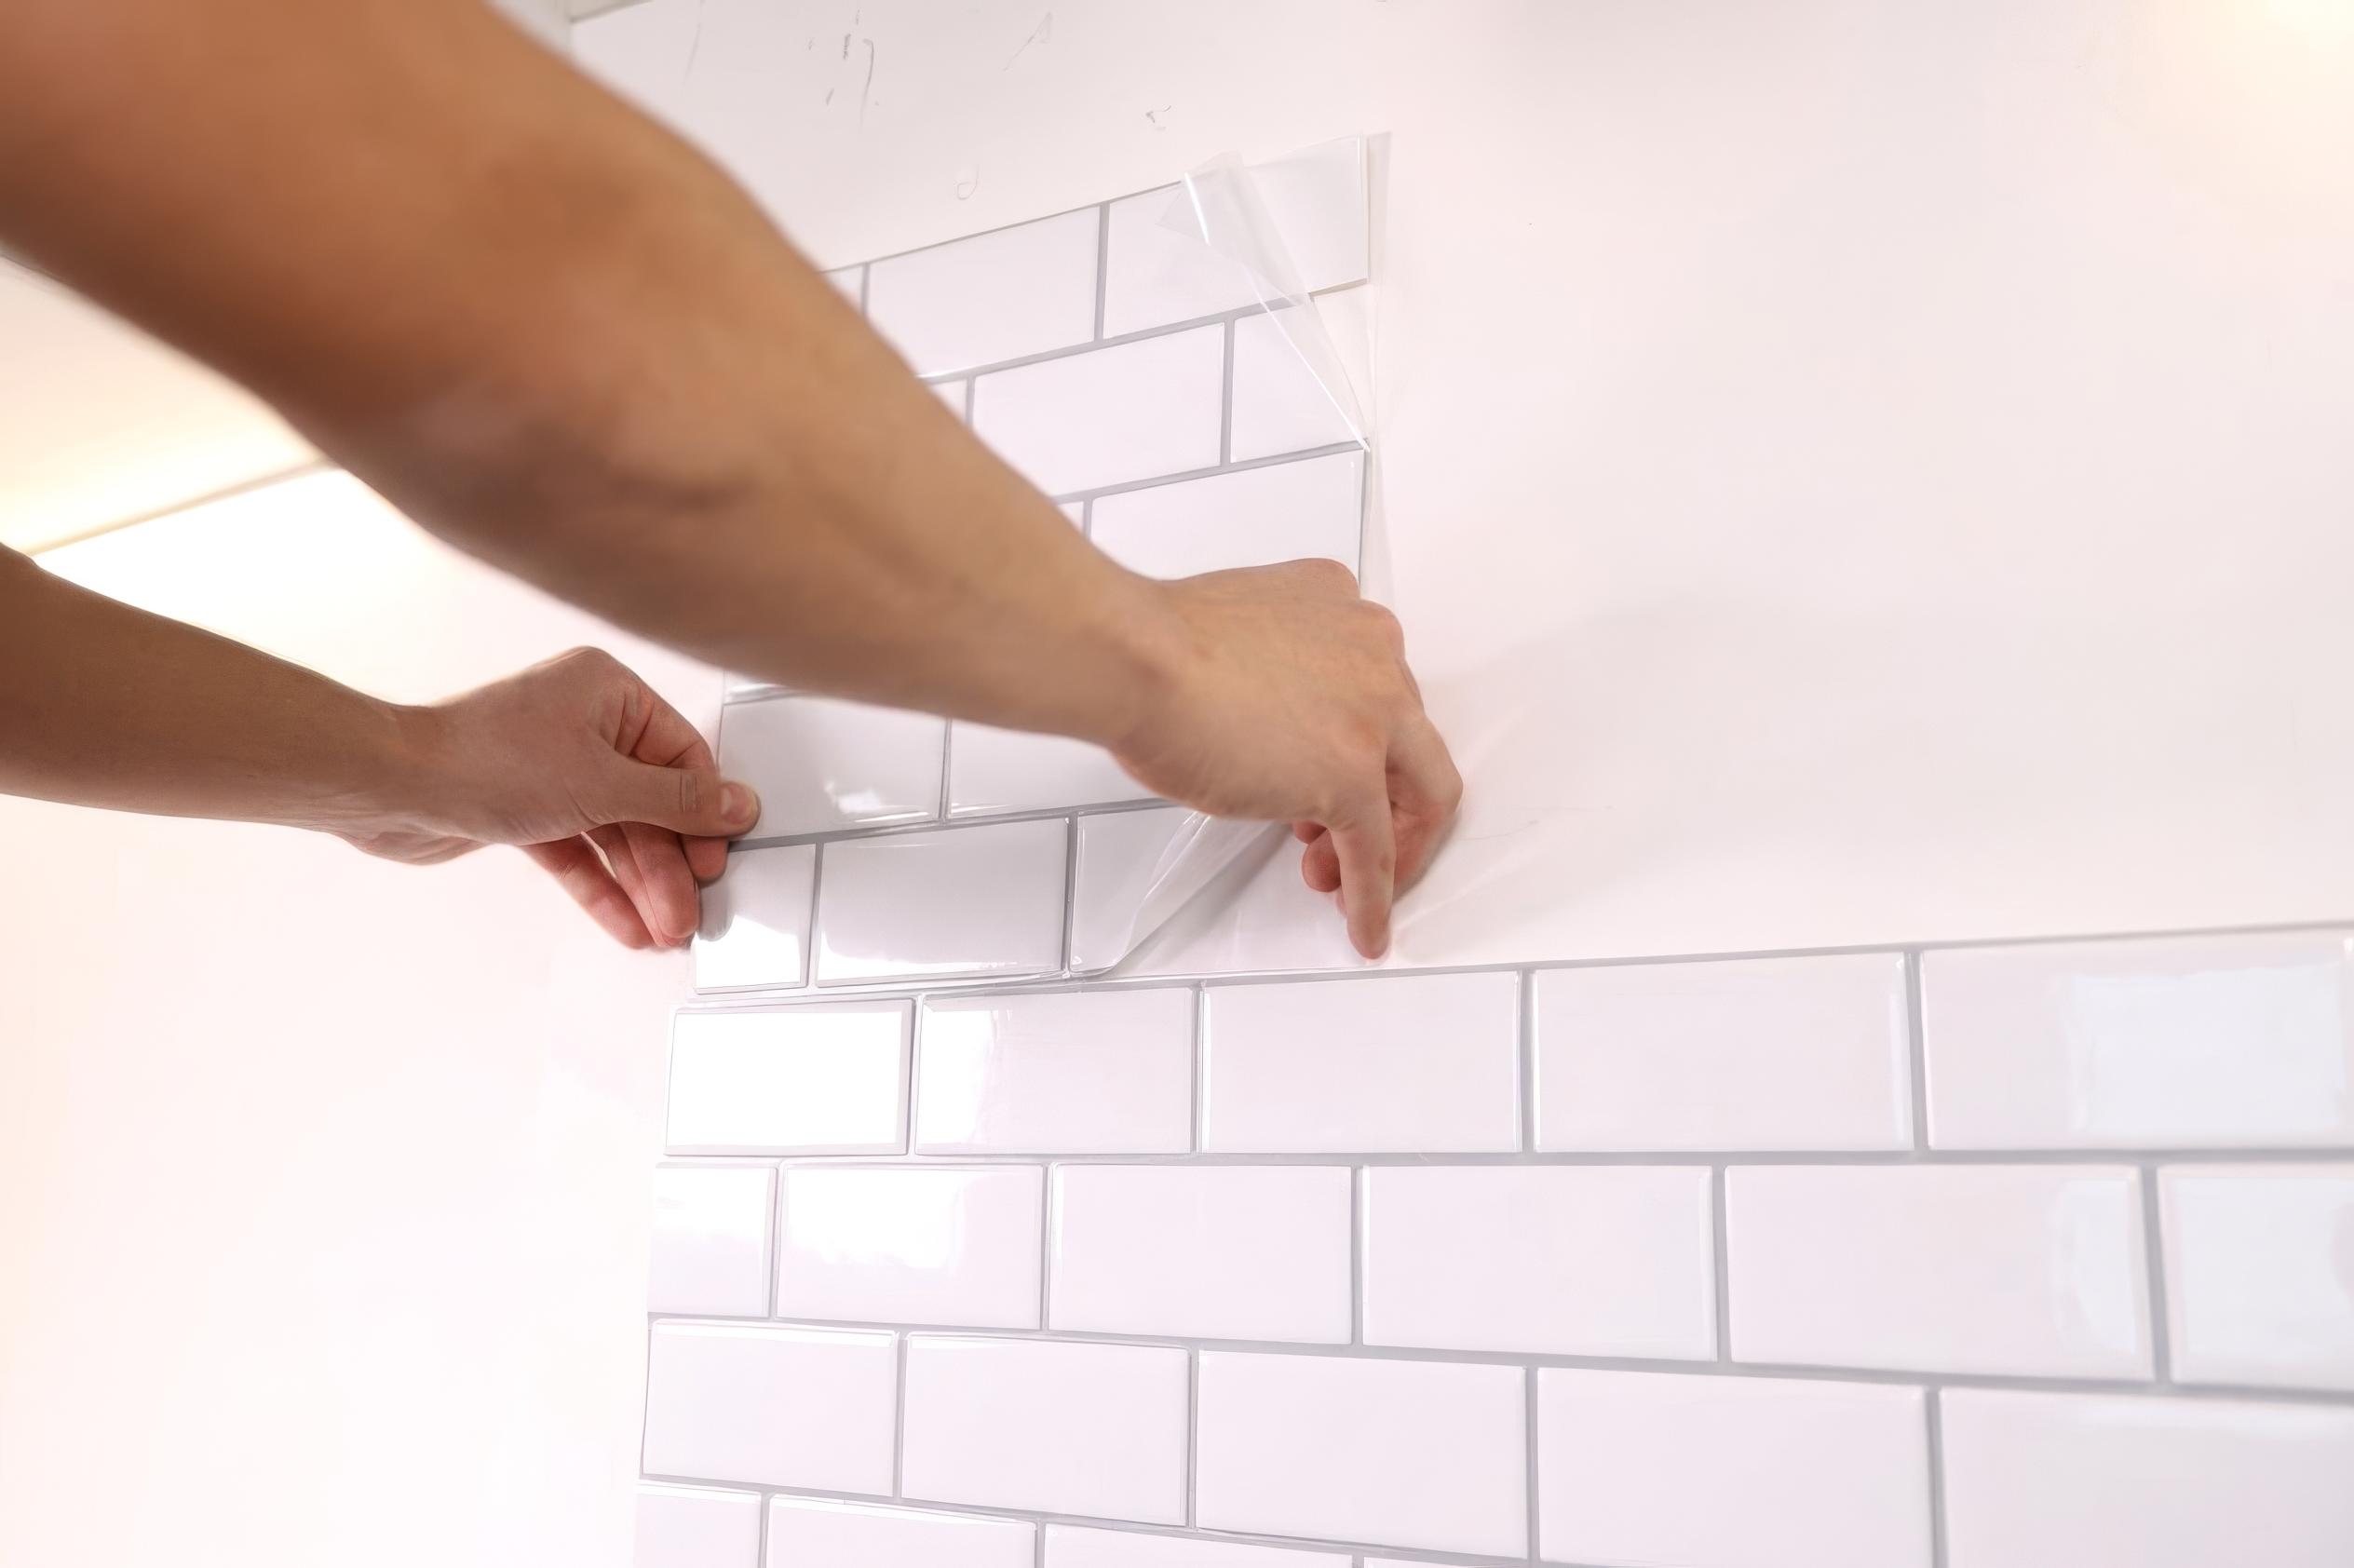
These are self-adhesive sheets, usually 10 to 12 inches square, that stick directly to the wall. Vinyl is the cheapest, 3D gel versions add realistic depth and grout lines, and stone or metal composites sit at the premium end. In Apartment Therapy's real-world test, 25 sheets at $7.99 each covered a standard kitchen backsplash for $199.75, with installation taking about an hour. The catch is the adhesive: on painted drywall, especially matte or cheaply painted walls, it can bond to the paint layer and take chips with it during removal. This method works best when you have smooth semi-gloss walls, a longer lease, and the patience to remove slowly with heat at move-out.
Enjoying this? Get more renter-safe ideas
Join the list for damage-free upgrades and our free Renter’s Decor Toolkit.
No spam. Unsubscribe anytime.
Tile stickers
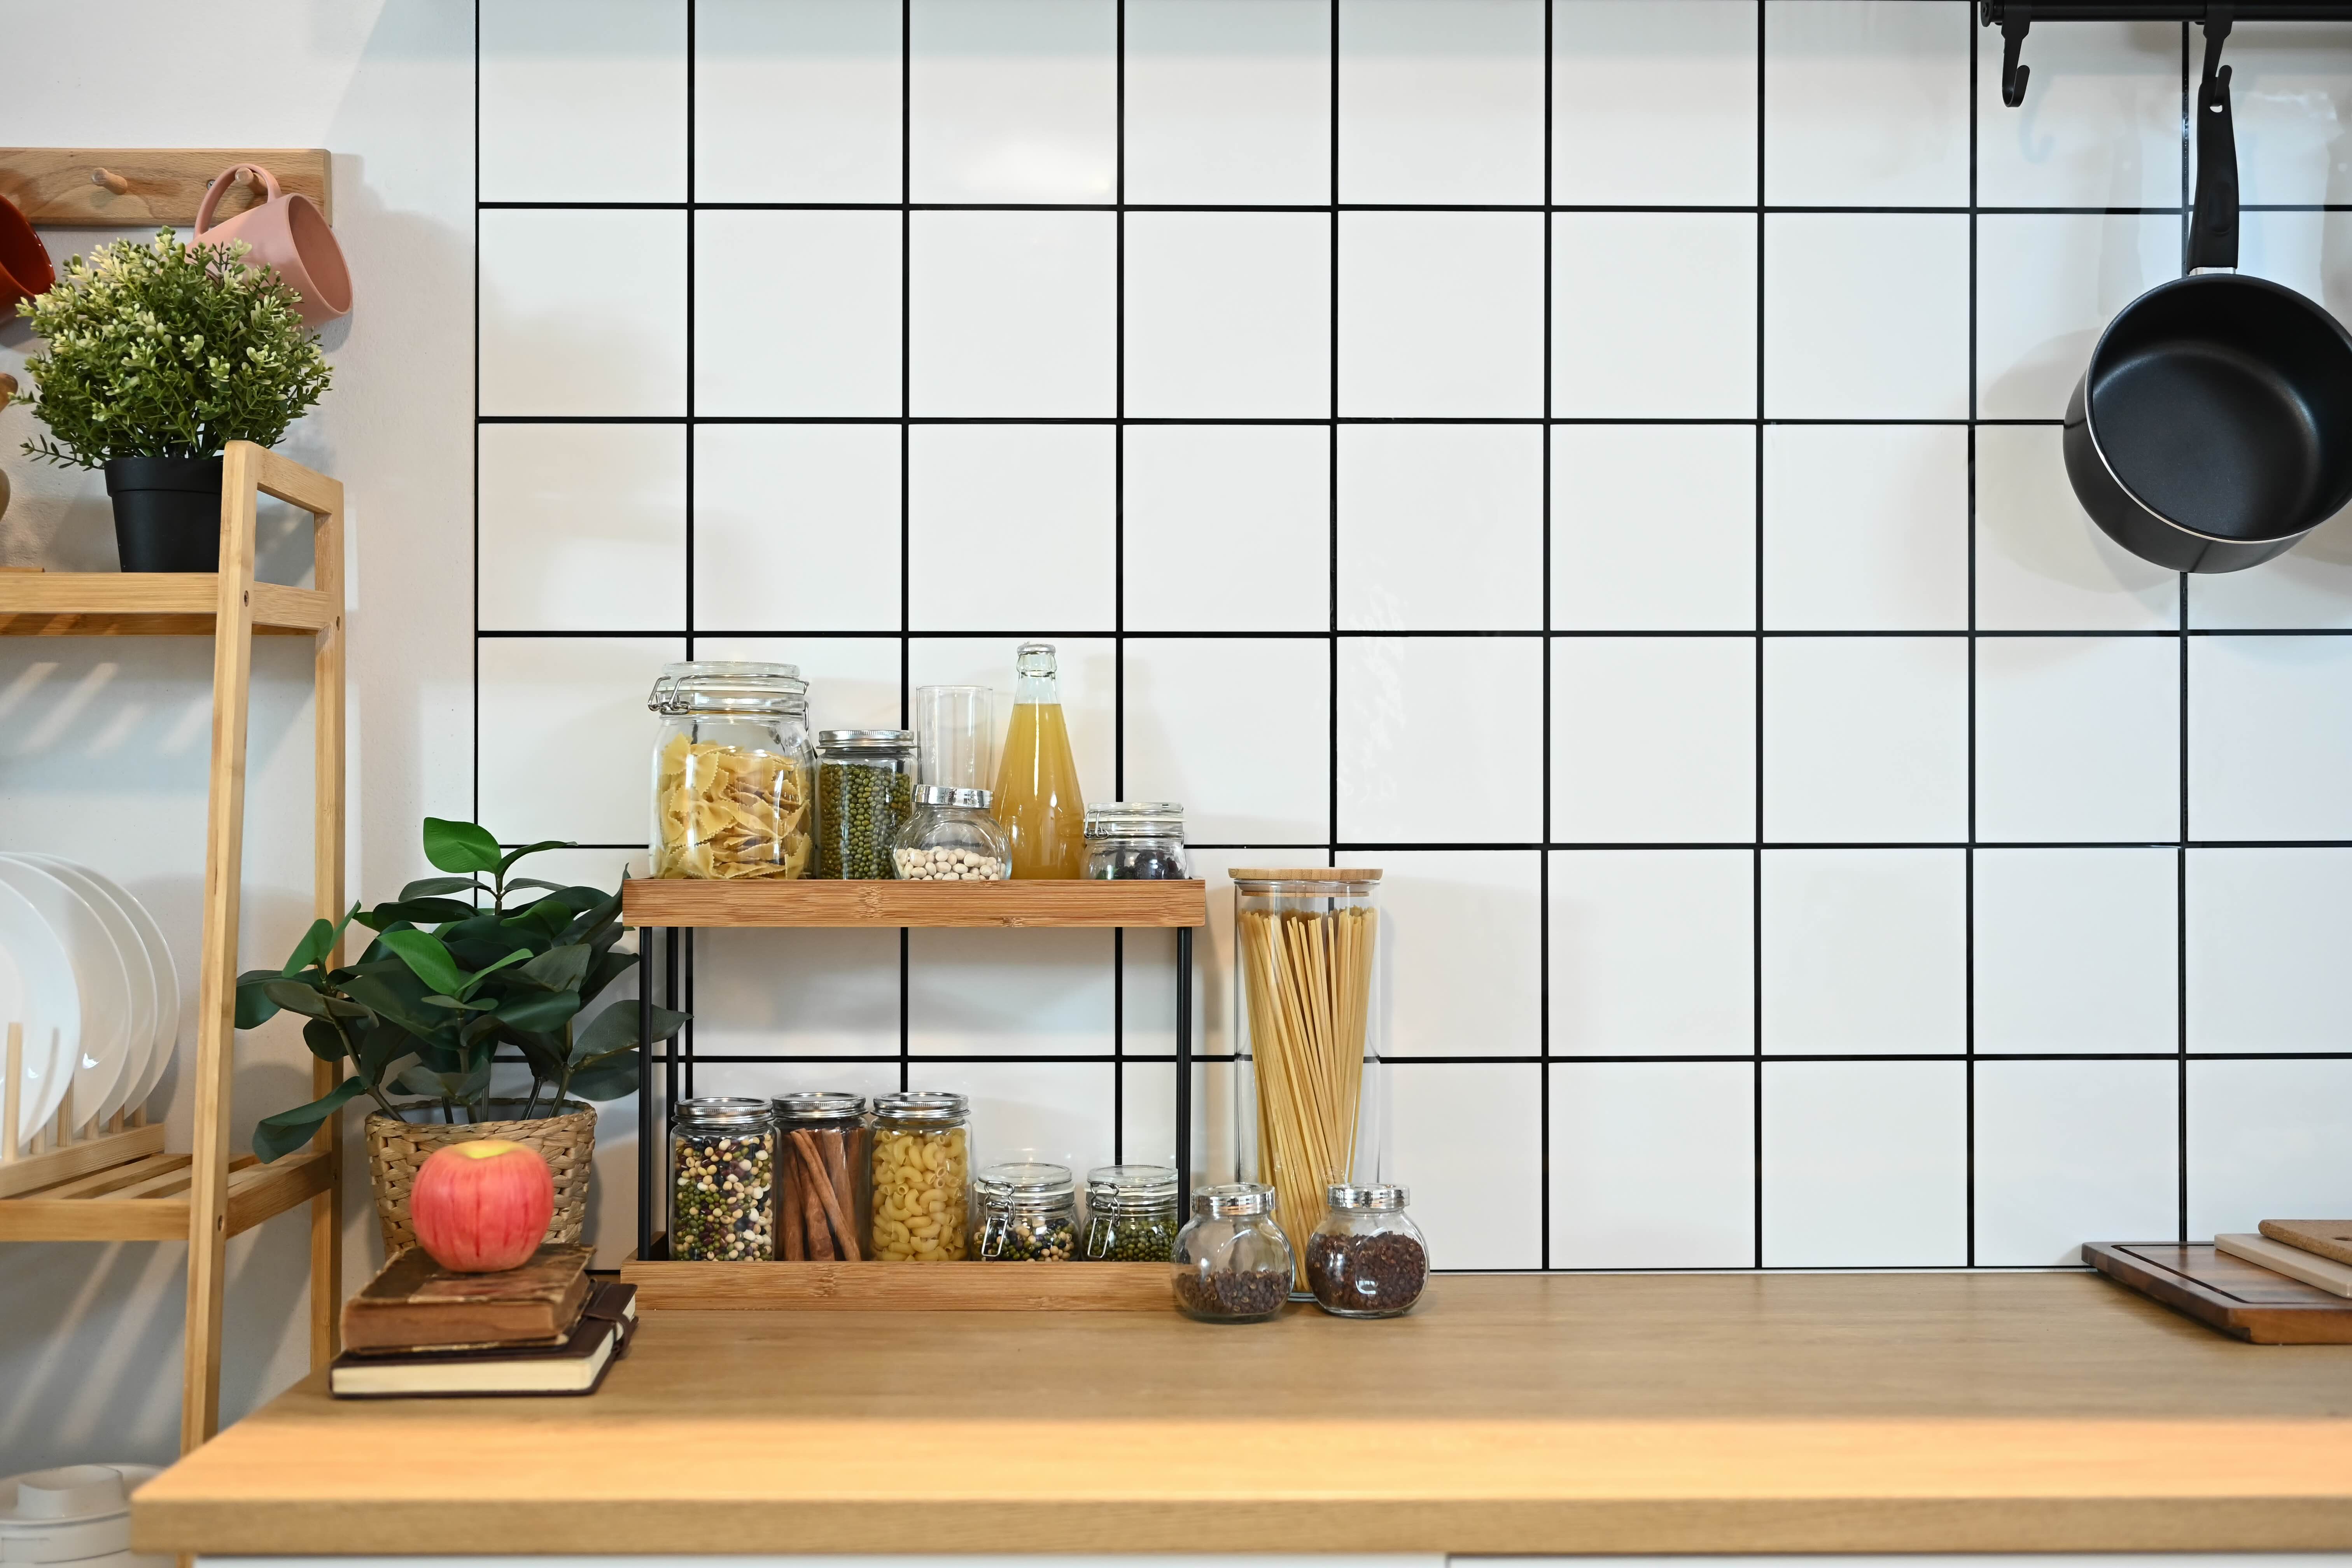
Tile stickers are thin vinyl decals sized to cover individual existing tiles. If your rental already has a backsplash you hate, this is the lowest-risk option of the three, because the adhesive bonds to glazed ceramic rather than paint or drywall. Glazed tile releases vinyl cleanly. Stickers apply in minutes per tile, a full backsplash usually costs $25 to $80, and removal is peel-and-done with little or no residue. The limitation is obvious: you need existing tile to cover. Stickers applied to painted drywall behave like any other adhesive and lose their risk advantage.
The plexiglass panel method
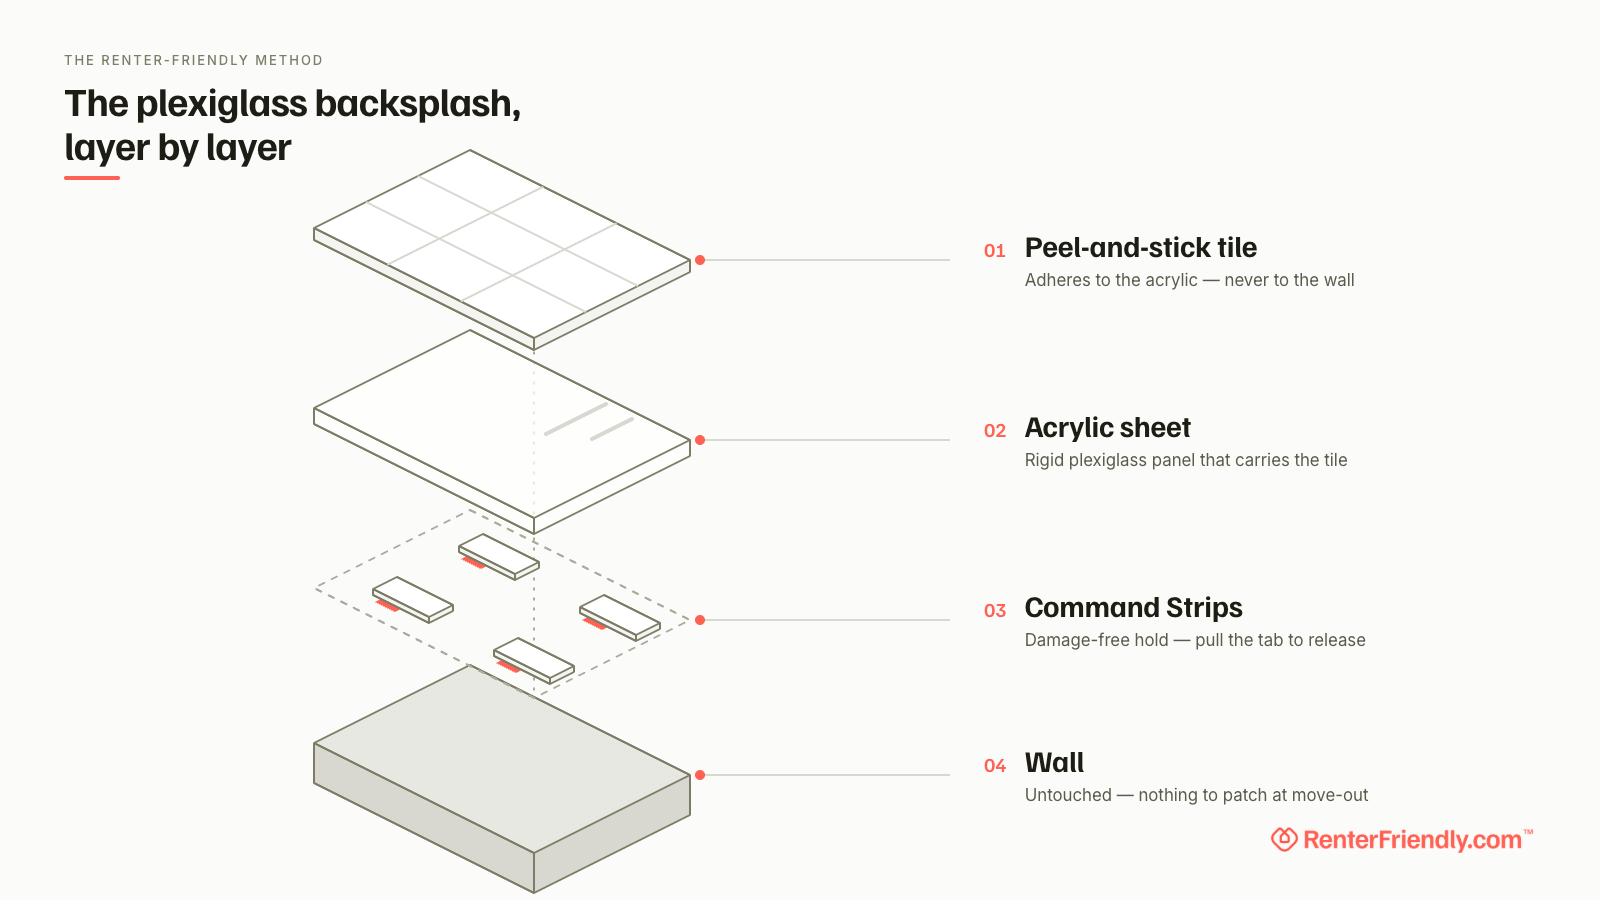
This is the method that keeps adhesive off the wall entirely. You cut acrylic (plexiglass) sheets to fit your backsplash area, apply peel-and-stick tile to the panels instead of the wall, then hang the finished panels using Command Strips or, if your lease allows small holes, a few nails. House Digest covered this approach as a direct answer to the paint-chipping problem with wall-applied tile. The wall only ever touches the Command Strip, which is designed to release cleanly. Bonus that no other method offers: the panels come with you when you move, so your next kitchen backsplash is already built.
Step-by-Step
The workflow below fits all three methods, with method-specific notes where they differ.
- 1Check your lease and your wall
Read the alterations clause in your lease before buying anything. Most leases allow removable decor but restrict "wall coverings" or "fixtures." If the language is vague, a two-line email to your landlord protects you. While you are at it, identify your surface: existing tile points you to stickers, smooth painted drywall points you to plexiglass panels or a careful peel-and-stick install.
- 2Measure and order 10 percent extra
Measure the width and height of the area you want covered. A standard rental backsplash runs 15 to 30 square feet. Order about 10 percent more material than the math says, which covers cutting mistakes and keeps spare sheets from the same production batch in case a tile gets damaged later.
- 3Run a patch test for 5 to 7 days
This is the single most important renter-safety step for peel-and-stick, and almost everyone skips it. Stick one tile or a cut piece in a hidden spot, behind the fridge or inside a cabinet-adjacent corner, and leave it for 5 to 7 days. Then remove it slowly with a hairdryer. If paint comes with it, do not put that product on your open wall. Switch to the plexiglass method instead.
- 4Degrease the wall and wait 24 hours
Kitchen walls carry an invisible film of cooking grease, and grease is the number one cause of peeling corners. Wash the area with a degreasing cleaner, rinse, and give it a full 24 hours to dry before applying anything. Apartment Therapy's testers spent about 90 minutes on wall prep alone, longer than the install itself, and that ratio is typical.
- 5Draw a level guideline
Do not trust your countertop to be level, because in most rentals it is not. Use a level to pencil a faint horizontal line where your first row will sit. Every row after the first follows from this line, so 2 minutes here saves a visibly crooked backsplash later.
- 6Cut, then apply from the center outward
Cut sheets with a utility knife and straightedge, or sharp scissors for mosaic-style sheets. For outlets, kill the breaker, remove the cover plate, trace it onto the sheet, and cut the opening before sticking. Peel back only part of the backing, align to your guideline, and press from the center outward to push air bubbles to the edges. For the plexiglass method, do all of this on the panels at a table, which is easier than working on a vertical wall.
- 7Plan removal on day one
Keep the leftover sheets, note the brand, and remember the removal technique: hairdryer on low for 30 to 60 seconds per tile, lift a corner with a plastic putty knife or old credit card, and peel slowly back at a sharp angle. Any residue comes off with a citrus-based adhesive remover. Never use a metal scraper on a painted wall.
Renter Considerations
Deposit safety: The risk is paint damage, not structural damage. A few paint chips can cost you a repaint charge of $100 to $300 from a deposit, which is why the patch test matters more than any product review. Tile stickers over existing tile and plexiglass panels essentially remove this risk.
Removability: Tile stickers come off in 15 to 30 minutes. Plexiglass panels come down in 10 to 20 minutes by pulling the Command Strip tabs. Direct-applied peel-and-stick takes 30 to 90 minutes for a full backsplash when removed correctly with heat, longer if you rush and have to clean up residue.
Surface compatibility: Glazed ceramic tile is the friendliest surface for any adhesive product. Smooth semi-gloss or satin paint is workable for peel-and-stick. Matte paint, fresh paint cured less than 30 days, textured walls, and wallpapered walls are all poor candidates for direct application; use the plexiglass method on those.
Lease concerns: Watch for clauses restricting "alterations," "wall treatments," or "adhesive products." Some leases specifically prohibit anything stuck to walls after a prior tenant left damage.
Landlord approval triggers: Email first if you plan to use nails for plexiglass panels, if your walls were painted within the last month, or if your lease uses broad alteration language. Approval in writing beats assumptions.
Test in a small spot first: 5 to 7 days minimum, in a hidden location, removed with heat. If the test spot survives, proceed. If not, you just saved your deposit for the cost of one tile.
Cost, Tools, and Materials
Item | Typical price range |
|---|---|
Peel-and-stick tile sheets (15 to 30 sq ft coverage) | $60 to $250 |
Vinyl tile stickers (full backsplash) | $25 to $80 |
Acrylic/plexiglass sheets (2 to 3 panels) | $30 to $70 |
Large Command Strips (4 to 8 pairs) | $10 to $25 |
Degreasing cleaner | $4 to $8 |
Utility knife and blades | $5 to $12 |
Citrus adhesive remover (for move-out) | $5 to $10 |
Peel and Stick Kitchen Backsplash
 @everythingeryn
Basic tools you likely already own: tape measure, level, pencil, sharp scissors, straightedge or metal ruler, hairdryer, plastic putty knife or an old credit card.
Recommended materials by method: 3D gel style sheets for the most realistic direct-apply look, standard vinyl stickers for covering existing tile, and 1/8 inch acrylic sheet for panels, which is rigid enough to stay flat but light enough for adhesive strips.
Pros and Cons
Peel-and-stick sheets | Tile stickers | Plexiglass panels | |
|---|---|---|---|
Pros | Most realistic finishes; widest style selection; mid-range cost; 5 to 10 year lifespan | Cheapest option; lowest skill required; near-zero deposit risk on existing tile | Zero wall adhesive; reusable in your next rental; works on surfaces other methods cannot touch |
Cons | Can pull paint on removal; needs smooth semi-gloss walls; heat-sensitive near stoves | Only works over existing tile; thin material shows imperfections underneath | Highest upfront cost and effort; panel edges visible up close; Command Strip weight limits apply |
Common Mistakes
Skipping the patch test
One hidden tile for a week tells you exactly how your wall will behave at move-out. Skipping it means finding out on 25 square feet of open wall instead.
Applying over matte or freshly painted walls
Matte paint bonds aggressively with adhesives, and paint cured less than 30 days releases in sheets. Both are the fastest routes to a repaint charge.
Rushing wall prep
Grease film is why corners lift within weeks. Budget 60 to 90 minutes for degreasing and a full 24 hours of dry time, which is the same prep window the successful published tests used.
Placing vinyl tiles too close to burners
Manufacturers recommend keeping vinyl peel-and-stick tiles 8 to 10 inches from stove burners. Closer than that, heat softens the adhesive and warps the tile face.
Ripping tiles off fast at move-out
Fast pulling is what takes paint. Heat each tile 30 to 60 seconds with a hairdryer, lift with plastic, and peel back slowly at a sharp angle.
Not buying extra sheets
Batch colors vary slightly between production runs. If you need one replacement sheet a year later and order new, it may not match. Ten percent overage solves this.
Treating water resistant as waterproof
Most peel-and-stick products handle splashes behind a sink but are not rated for standing moisture or shower enclosures. Water that gets behind a tile breaks down the adhesive and can trap moisture against the wall.
Beyond the Basics: More Renter Friendly Backsplash Angles
peel and stick backsplash for renters: The renter-specific rules are stricter than the general instructions on the box. Patch test for 5 to 7 days, stick to semi-gloss walls, keep 8 to 10 inches of stove clearance, and remove with heat. Expect $4 to $12 per square foot, with 3D gel styles giving the most convincing finish for the money.
tile stickers for renters: Stickers are the answer when your rental already has tile you dislike. A full backsplash of vinyl decals costs $25 to $80, applies in an afternoon, and peels off glazed ceramic cleanly at move-out. Measure your existing tiles first, since stickers come sized to standard 4 inch and 6 inch squares.
plexiglass backsplash: A plexiglass backsplash means mounting peel-and-stick tile to 1/8 inch acrylic panels and hanging the panels with Command Strips, so no adhesive ever touches the wall. Budget $100 to $350 all-in. It is the only method where you keep the backsplash when you move.
removable backsplash: Every method here qualifies as a removable backsplash, but removal difficulty varies widely: 10 to 20 minutes for panels, 15 to 30 minutes for stickers, and up to 90 minutes for direct-applied sheets removed carefully with heat. Choose based on how you want move-out day to go, not just how install day looks.
temporary backsplash for apartment: For a stay under two years, prioritize reversibility over durability. Tile stickers or plexiglass panels suit short leases best, since quality peel-and-stick can last 5 to 10 years, which is more permanence than a one-year apartment lease needs.
renter friendly kitchen backsplash: Kitchens add two constraints bathrooms do not: cooking grease and stove heat. Degrease thoroughly before install, re-wipe the tile face monthly, and keep vinyl products 8 to 10 inches from burners. Behind-the-stove zones are where gel or composite tiles outperform cheap vinyl.
will peel and stick backsplash damage walls: It can. In Apartment Therapy's hands-on test, readjusting a Smart Tiles sheet chipped wall paint, even though the product is marketed as removable. Damage is most likely on matte, low-quality, or freshly painted walls and least likely on glazed tile. The patch test plus heat-assisted removal is what keeps the answer at "no" for your wall.
Final Thoughts
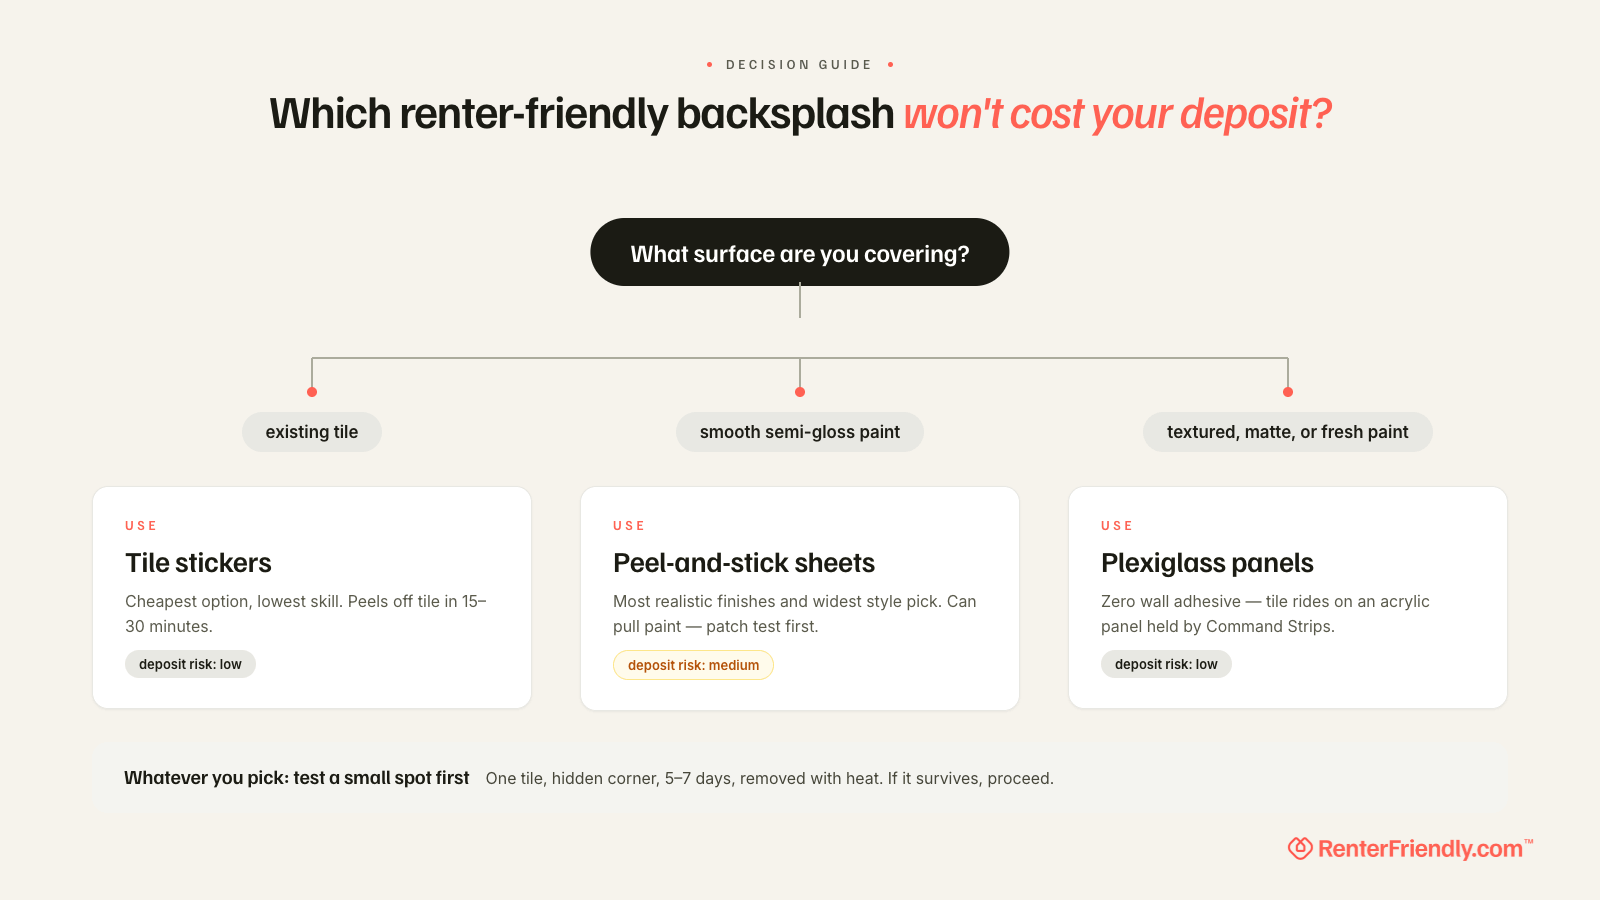
The right method comes down to one question: what surface are you covering? Existing tile means stickers. Smooth painted drywall with a longer lease means peel-and-stick, applied after a real patch test. Anything textured, freshly painted, or matte, or any situation where you want zero risk, means building panels.
If you rent, you have probably been burned by a product that promised "damage free" and delivered a repaint charge. The fix is not a better brand, it is a better process: test hidden, prep clean, install level, remove slow. Every documented failure in the published tests traces back to skipping one of those four.
Your first move today takes five minutes and costs nothing. Measure the backsplash area behind your counter, note whether the surface is paint or tile, and check your lease's alterations clause. Those three facts decide the method, and everything after that is a weekend project.
Sources & References
- [1] Apartment Therapy Smart Tiles Review - Apartment Therapy
- [2] House Digest plexiglass backsplash method - House Digest
- [3] 3M Command Strips usage and removal - 3M
- [4] Smart Tiles surface compatibility guide - Smart Tiles


